Distress Inks - A Tutorial
Sunday, January 08, 2012I love my Distress Inks. There is so much that you can quickly do with them to create different effects. When I was looking at the concept for the 'Dream' card, I thought I would experiment with a few different techniques using my Distress Inks for the background. I thought I would share a photo tutorial showing the basics for creating your own backgrounds. Please keep in mind that these were done very quickly to view a variety of effects and will alter depending on the colour/intensity/technique that you use. I am also no expert in Distress Inks but just enjoy playing around to achieve different looks.

I have just used a standard white card stock and a mixture of the Faded Jeans and Broken China Distress Inks. You will also need an iron, a spray bottle filled with water, a blending tool, and a non-stick craft surface to work on. I am in the process of having my craft desk refurbished so I have just used the back of my cutting mat which seems to work fine.

Top Left:
For this technique, I used a blending tool with the distress inks to create a really pigment-rich blended background. I was looking to achieve more of a coloured paper effect rather than a heavily distressed effect. To achieve this look, use your blending tool in a circular motion to build up the colour on the cardstock. I like to start from the edges and blend inwards so that the colour gradiates.
Keep going over the colour and gradually increase the intensity until you are happy with the result.


Top Right:
For this technique, I started in the same way that I started the previous: blending the entire cardstock until you reach the intensity level you are after. Once I have reached this, I lightly spray the cardstock with water using a mister. This creates the speckled effect and allows for the inks to run. You can experiment with the amount of water used here: more water will allow the ink to run further, changing the pattern.


Once I am happy with the result, I use a househol iron on a low setting to dry off the ink. You don't have to do this step but I find that if you don't the card can start to warp. However, you can iron the cardstock once it is dry to flatten it out if you prefer the pattern it creates when it is wet.


Bottom Left:
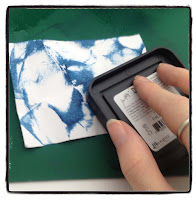
This technique is a lot of fun - but it can get messy! For this technique, rub your distress ink pads directly on to a non-stick craft surface (I used my cutting mat). You can use more than one colour to create a different effect. Once you have covered your surface with ink, lightly mist with water to get the inks to spread.


Next, get your cardstock and rub over the inks on your work surface. Make sure you have covered the entire face of cardstock. I then lightly iron the paper using a household iron on a low temperature setting to set the ink and to ensure the cardstock lays flat.


Bottom Right:
This technique creates an entirely different look and again can look really effective if using more than one colour.
The first step is to get your cardstock and lightly crumple it. Be careful not to rip your cardstock. Lay the cardstock out flat. Then, grab your distress ink and rub all over the crumpled card stock. It is ok if the ink does not cover much of the cardstock.
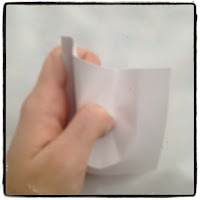
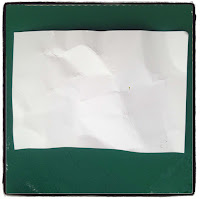

Next, get your misting bottle filled with water and lightly spray the cardstock. This will activate the ink and allow it to spread. Depending on the amount of water you spray,you have the ability to control the pattern and direction that the ink flows. Experiment with different techniques! Again, I lightly iron the cardstock once I am finished playing to ensure that it lies flat. This is also a good step to remember with this technique as the ink may run out to the edges if the cardstock is not lying flat.


And that's it! Four different techniques to get you experimenting with your Distress Inks. Please keep in mind that I am no professional with using the Distress Inks and am still learning myself, though I found these techniques helpful to create custom cardstock for my projects.
If you would like to learn more, the Tim Holtz Blog has some fantastic video tutorials which are very helpful!
Thanks for stopping by :)
Supplies


2 comments
I needed to come across this tutorial. I'm very heavy handed with my sponging and most attempts end up in the bin. Thanks I'm going to give it another try following your tips.
ReplyDeleteI just love distress and the many different ways to use them :-) And the more you use these techniques them more creative you get making your own techniques.
ReplyDelete